Ensuring that your sump pump is well-maintained is key to its efficient function and protecting your property from water damage. Periodic cleaning of your sump pump wards off breakdowns and prolongs its service life, protecting you from expensive repair bills.
This article provides a straightforward DIY method on how to clean a sump pump. For more intricate problems or if you seek professional care, Modern Comfort offers expert maintenance and repair services. Contact Modern Comfort to guarantee the best performance and extended life of your sump pump.
How To Clean A Sump Pump: Essential Care & Upkeep
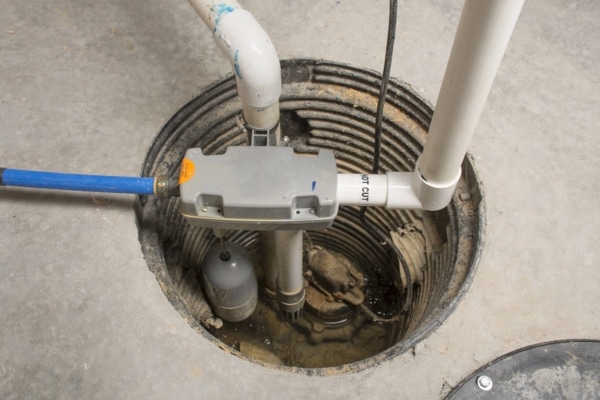
Keep your sump pump in optimal condition to avoid basement flooding, especially during periods of significant rainfall. It acts as your primary safeguard, efficiently controlling water levels and channeling surplus water away from your home’s foundation. Failing to maintain your sump pump can cause it to malfunction during critical times, leading to water damage and potentially expensive repair needs.
Regular cleaning and servicing of your sump pump prolongs its functional lifespan and improves its efficiency. Ensuring the pump is clear of debris and that all components function correctly minimizes the likelihood of sudden failures.
Such preventive care helps avoid the costs associated with early replacements and enhances the pump’s performance, reducing energy expenses and increasing system reliability.
Prioritize Efficiency: Don’t wait until the last minute. Arrange a sump pump inspection with Modern Comfort and ensure your home stays dry. Call now!
Supplies Needed for Cleaning a Sump Pump

Before you start the cleaning process for your sump pump, it’s important to assemble all the necessary tools and materials. Here’s what you will need:
- Gloves: Wear these to protect your hands from dirt and potential sharp objects within the sump pit.
- Bucket: This is useful for extracting water and debris from the sump pit.
- Plastic Scraper: This tool helps remove sludge and debris adhering to the pump and basin.
- Vinegar: Modern Comfort recommends this as an effective cleaning agent for breaking down mineral deposits.
- Garden Hose: Use this to thoroughly rinse out the pump and pit, washing away any loosened debris and residues.
- Towels or Rags: These are essential for drying the components after cleaning and wiping down surfaces.
- Screwdriver Set: This is needed to disassemble parts of the pump if necessary.
- Flashlight: This provides necessary lighting in the typically dark sump pit area.
Safeguard Your Residence: Keep your sump pump in prime condition. Contact Modern Comfort for professional maintenance services today. Call today!
Prioritizing Safety
Before you begin cleaning your sump pump, it’s essential to prioritize safety. Make sure to disconnect the power supply to avoid any electrical hazards. Moreover, wear protective gear like gloves and goggles to shield yourself from sharp objects and harmful contaminants that may be present in the sump pit.
It is crucial to adhere to these safety protocols to prevent accidents and avoid damaging your sump pump. If you have any doubts about the safety procedures or any part of the cleaning process, Modern Comfort recommends reaching out to their professional team. This precaution ensures your safety and helps maintain the integrity of your sump pump system.
Step 1: Remove the Sump Pump Cover
The first step in cleaning your sump pump is to remove the cover safely. Initially, ensure the power is completely disconnected to eliminate any electrical hazards. Use the right screwdriver to carefully loosen any fasteners that hold the cover in place.
Have a small container or a magnetic parts tray close by to keep the screws and any small components you remove; this helps prevent losing any parts and facilitates easier reassembly. Gently lift the cover off, being cautious to avoid letting debris fall into the sump pit.
Ready to Assist: Facing issues with your sump pump? Modern Comfort delivers quick and reliable solutions. Get in touch now!
Step 2: Clean the Sump Pump Filter Screen
Your next task is to locate and remove the filter screen of your sump pump. This component is usually found at the bottom of the pump and functions as a filter, blocking debris from entering. Gently remove the screen, which may be secured with clips or screws.
Once it’s detached, clean it meticulously using a soft brush and soapy water. Scrub the screen carefully to eliminate dirt, grit, or tiny particles that might hinder the pump’s performance. Thoroughly rinse it under running water to get rid of all traces of soap before reattaching it to the pump.
Step 3: Examine and Clean the Sump Pump Impeller
Ensuring the impeller of your sump pump is clean is critical for its effective operation. The impeller, which is the rotating part that moves water, can often get clogged with debris. Begin by removing the necessary screws from the pump housing; refer to your pump’s manual for specific guidance on your model.
Once you have access to the impeller, look for and clear any obstructions such as stones, twigs, or accumulated grime using a small tool like tweezers or a plastic pick. After clearing the debris, wash the impeller with clean water to make sure no residues are left behind. Reassemble the pump once everything is clear and clean.
Total Sump Pump Care: Modern Comfort offers comprehensive maintenance to ensure your system operates flawlessly. Contact us today!
Step 4: Cleaning the Interior and Exterior of Your Sump Pump
Thoroughly clean the interior and exterior to make sure your sump pump works at peak efficiency. Start with the interior by preparing a mixture of vinegar and warm water. Pour this solution into the pump basin and let it sit for a few minutes to break down mineral deposits and grime.
Use a brush to scrub the inside of the pump, paying extra attention to areas with heavy buildup. After scrubbing, rinse the interior well with clean water to eliminate any remaining vinegar solution and debris. For the exterior, wipe down all surfaces with a damp cloth to remove dust and contaminants. Make sure all parts are dry before you begin reassembling the pump.
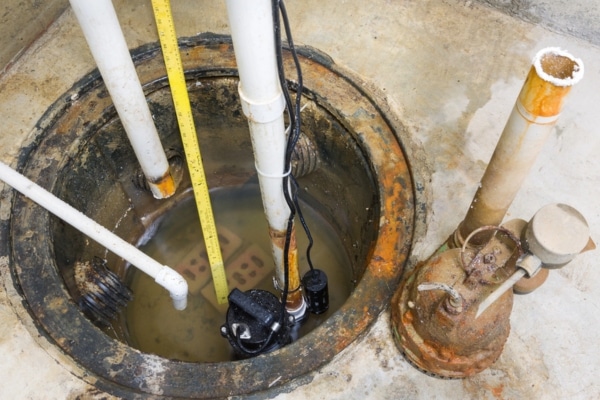
Step 5: Inspect and Clear the Sump Pump Discharge Lines

It is vital to ensure that the discharge lines of your sump pump are free from clogs and obstructions to maintain its efficiency. Begin by visually inspecting the discharge lines for any apparent signs of blockages or damage. If you find evidence of a clog, gently use a plumber’s snake to clear the lines.
For a more comprehensive cleaning, use a garden hose to flush the lines with a strong stream of water, helping to remove any lingering debris. Once the lines are cleared, perform a final check to confirm that the water flows freely. This is critical to prevent backups and guarantee that the pump can effectively get rid of water from your foundation.
Professional Sump Pump Services: Rely on Modern Comfort to enhance the longevity and efficiency of your sump pump. Schedule your service now!
Step 6: Reassemble and Test the Sump Pump
Once you have finished cleaning, start reassembling your sump pump by putting back components such as the impeller and inlet screen. Make sure that these parts are securely in place. Refer to your pump’s manual to ensure every piece is correctly positioned for optimal performance. After reassembly, reconnect the power to the unit.
To test the pump’s functionality, fill the sump pit with sufficient water to activate it. Observe the pump as it starts up, checking that it runs smoothly and efficiently and pushes water out through the discharge lines. Listen for any strange noises and watch for steady operation. This test is crucial to verify that the pump is functioning properly and is prepared for any potential water influx.
Step 7: Establish a Regular Maintenance Schedule for Your Sump Pump

It’s crucial to have your sump pump regularly inspected by professionals to ensure its reliability and efficiency over the long term. These checkups help identify potential issues early on, preventing significant problems or failures, particularly during critical periods such as heavy rainfalls.
Establish a maintenance schedule with Modern Comfort to keep your sump pump performing optimally. Modern Comfort provides specialized maintenance services designed to prolong the life of your sump pump, ensuring it operates effectively when most needed. Regular professional check-ups can ultimately save you both time and money.
Conclusion
Keeping your sump pump clean is vital for maintaining its efficiency and reliability, especially during heavy rainfall. By adhering to the seven outlined steps—from removing the cover to establishing a regular maintenance routine—you can significantly extend its service life and improve its performance.
If you encounter any challenges during the DIY cleaning process or prefer the assurance of professional service, Modern Comfort is here to help. Contact Modern Comfort for expert maintenance to ensure that your sump pump functions optimally and continues to protect your home from water damage.
Reliable Protection: Ensure the uninterrupted performance of your sump pump. Consult Modern Comfort for expert service and peace of mind. Call today!
Contact Modern Comfort for Premier Plumbing Services
Get in touch with Modern Comfort for reliable plumbing support across Central Maryland and Southern and Central Pennsylvania. We provide a comprehensive range of services, including drain cleaning, water heater installations, leak repairs, and more, all customized to fit your needs and budget. Take advantage of our same-day emergency plumbing service, designed to tackle your most urgent plumbing issues quickly and cost-effectively.
Our service is celebrated across the region. Our certified professional plumbers deliver superior workmanship and guarantee your complete satisfaction. Contact Modern Comfort for a complimentary consultation and experience our commitment to excellence.
Experiencing plumbing problems? Contact us today! Our skilled team is ready to handle all your plumbing needs.
You can click here to contact us now or call us at (410) 429-7252 (MD residents) and (717) 489-3939 (PA residents) to find out more! Click the link to view our service area.
Related Articles:

Recent Articles